Friday, December 23, 2022

The Best Sugar Cookies

 YOU GUYS!  It is Christmas Eve, EVE! ACKK!  I had to do it, I had to go pick up a couple of stocking stuffers today.  I swore it wasn't going to happen this year, but I don't mind so much.  The hustle and bustle are exciting to me and celebrating the birth of Jesus is the MOST exciting.  I don't care if he was born in March, this is when we celebrate, and I am here for it!

I tried ad am going to succeed in getting 3 cookie recipes up this week.  One more will follow Christmas Eve morning or late, late tonight!  In the wee hours of the morning!  It is only 3 ingredients, so buckle in.

There are so many sugar cookie recipes out there, but in my humble opinion this is the best.  If you cake it at just the right middle time, you get soft amazing sugar cookies, bake it for 1 maybe 1.5 minutes longer and you have a crunchy crispy cookie on your hands!  Roll them out thicker for soft as well, and thinner for crispy.  There are so many ways to control this one and make it like you want it!  I would love to chat more, but time is moving on faster than I want, and I have to get this last recipe filmed for you so let's get to it friends!

You will need:

  • 2/3 cup shortening
  • 2/3 cup butter (room temp)
  • 1/2 cups granulated sugar
  • 2 eggs
  • 2 tsp vanilla extract
  • 2 tsp baking powder
  • 1/2 tsp salt
  • 3 3/4 cup flour

Preheat your oven to 350F,  In a bowl with a hand mixer or standing mixer, add in shortening and butter.  Mix until fluffy and combined.  Add in sugar and mix until combined.  Next crack in your eggs, vanilla, baking powder and salt and mix until completely combined and smooth.  Add in flour in 2 additions.  Mix until JUST combined and then stop!  If you over mix your dough, you will be eating Christmas hockey pucks, and nobody has time or teeth for that.  Now here is where the choices come in.  For cut out cookies, refrigerate for 1, or up to 2 hours before rolling out and using cookie cutters.  If you are just rolling them into balls, and rolling in sugar, go for it.  The sooner the better because well, it is obvious the sooner you taste test!  

Cut Out Cookies For a softer, thicker cookie, roll out thick and bake for about 12-13 minutes.  For a thin crispy cookie, roller thinner and bake about 12-13 minutes.  

REMEMBER: your oven may run hotter or cooler than mine, so you keep checking that first pan and go from there!


ENJOY and MERRY CHRISTMAS!


Wednesday, December 21, 2022

Ganache Thumbprint Cookies

 There is so much merriment going around these days that just typing this recipe makes me excited and happy for Christmas!  I am so happy to see you all again.  It has been a bit of a personal struggle the last few weeks in my life but, I am going to try and get some last minute cookie recipes up!  Get to baking friends!  Have you done all your baking and it is tucked safely in the freezer until cookie plate or tin making comes for friends and family?

This is a super easy recipe, I just wanted to make thumbprint cookies but change up the jam, because to know me is to know I am not a huge lover of fruit.  I know...

But, thanks to my dislike of jam, this little butter-ish, only slightly sweet cookie is EASY and quick.  I even did a video for you and that will be down the page a bit. You take a bit and then you get this little pop of rich and deep chocolate flavor, and it is the perfect match!  Not overly sweet but still sweet enough.  Does that even make sense?  Guess you will have to try it to find out.  I am in a time crunch here, I have Peanut Butter Balls, in the freezer, and just edited some family baby photos I took.  Let's get to the recipe!

  • 1 cup softened butter
  • 1 cup granulated sugar
  • 1/2 tsp vanilla extract
  • 2 cups AP flour
  • ganache (sm. recipe below)
Preheat your oven to 350F.  I use a silicone mat, but you could lay your cookie sheet with parchment paper or use a nonstick spray.  In a bowl with hand mixer or in a stand mixer, combine all ingredients, with flour last.  (we will make the ganache later) Mix until just combined.  You may think this dough won't hold together but I promise it will!  The heat of your hands as you roll them into balls will keep them together.  Roll all dough into balls and bake for 15 minutes.  When you take them out, let them sit and cool for about 3 minutes, using your thumb or the end of a spoon, make your "thumbprint".  I did mine before I baked them and ended up having to redo them anyway.  Don't burn yourself!  Set aside to cook the rest of the way.

In a small glass bowl or glass measuring cup, heat up 1/4 cup heavy whipping cream.  Heat until it bubbles around the outside.  Add in 1/2 cup milk or semi-sweet chocolate chips.  Let sit for 5 minutes and then stir until it is dark in color and rich!  Now using a way smaller spoon than I did, fill up the thumb print with your ganache and refrigerate for about 10 minutes to give it a headstart or let sit at room temp until the chocolate has set.  Oh so good!

Store in an airtight container or freeze in a storage bag, ot just eat them.  I mean isn't that the end goal anyway?

ENJOY holiday baking and holiday eating!


Saturday, November 12, 2022

Chocolate Caramel Apple Bark

 Good afternoon my dear friends.  I am so happy to see you back, and welcome to anyone who may be new here!  We are back with an easy dessert for fall, or anytime you need something sweet.  These are getting right up outta this house and going to work with my husband.  They aren't safe here.  And neither am I!

I have seen this "recipe" if you will, all over the place.  I mean, I have seen them done 10 different ways.  Make your own caramel, caramel sauce (still haven't figured out how that works), caramel bits, traditional caramels...you get my point.  I would have chosen to make my own caramel, it is so easy, but I had already bought these caramels, and can we get to the real questions??  Do you say CARMEL, or CARAMEL?  Inquiring minds....

I can't believe Thanksgiving is 2 weeks away.  Random I know.  I am not cooking this year!  Well, I am but just having the holiday at my sisters so I am bringing Pineapple Stuffing because my family can't have a holiday without it, green beans, because I accidentally bought 10 bags of frozen green beans while doing my Wal-Mart grocery delivery order, and stuffing, because I like mine best.  I will probably crank out a huge pan of baked mac and cheese as well for good measure.  I think I am subconsciously all ready for it to be here.  Thanksgiving dinner is my favorite meal of life, besides good seafood which is hard to come by in Nebraska!  The end.

I will have explained in this video why I did a few things differently than maybe some other recipes you have seen for this.  I did change up a major thing which was using freeze dried apples instead of fresh.  Ain't nobody got time to risk apples turning brown, including me!  I hope you enjoy and HAPPY FALL!!  Sending blessings to you all!

You Will Need:

  • 2 cups chocolate or white chocolate chips (I choose 1 cup of milk chocolate and 1 cup white chocolate
  • 2 cups of caramels (measure before melting)
  • 1/2 cup pistachios (shelled)
  • 1 cup freeze dried apples (smoosh them up a little so the bark is easier to break when done) OR use 1 apple of your choice, diced small.
  • pretzels, between 1/2 to 1 cup.  
Line your cookie sheet with a silpat or parchment paper.  Melt your chocolates you can do it in the microwave or on the stove.  If you do them in the microwave, you need to heat them in 30 second increments, and stir between ever 30 seconds.  If you overheat/scorch them, it will be a clump of what appears to be half dried mud.  Not a good look or taste.  Now you canc use all chocolate chips, milk or semi-sweet, but I opted for 1 cup of white chocolate chips and 1 cup of milk chocolate chips because I don't LOVE chocolate with the caramel apple flavor.  No don't come for me, a little is fine, but the entire base of the bark, no thanks.  It worked out more than perfect.  Make sure your chips are at room temp when you heat them.  Mine were out of the freezer and tried to seize up but I rule and caught them in the nick of time.  You will see this on the video.  When I spread the chocolate out, I then crushed up pretzels in my hand.  You can lay them out nice and tidy if you so choose, I didn't so choose.  I then sprinkled the pistachios on.  I saw some bare spots and panicked!  Hehe

Next, melt the caramel, SLOWLY heat it.  I did my caramel on the stove.  When it is completely melted, (keep stirring soldier) stir well and then pour on top of the chocolate/pretzels/pistachio layer and spread out evenly.  I left a small border so you could see the chocolate layer around the edges.  Work quickly so you can get your apples on top before it sets.  I just used my hands to crunch up my apples still in the bag.  I happened to get these apples at Dollar Tree because I was there, and we have tried them before, and I didn't want to use fresh apples. Problem solved.  Get them on, press them down a bit and let sit for at least 1 hour.  

Break it up and place in an airtight container.

The textures of this you guys....is awesome.  A slight chew from the freeze-dried fruit, crunch from the pistachios and pretzels, creamy chocolate, chewy caramel.......it all comes down to the fact you just need to make these.  It doesn't have to be more difficult than that!

ENJOY!


Tuesday, November 1, 2022

Cinnamon Caramel Crunch

Hello friends!

Hoping this finds you all happy and healthy!  It is November 1st.  WHAT?  How is this even possible?  NOVEMBER!  CHRISTMAS SEASON!  AACCKK!  Most unnerving is that there will be snow soon.  At the beginning of every winter, I ask myself why we are still here?!  Then the first snow happens, and I am thrilled, and then I am over it again.  I mean, it is what it is.  Right?  

This is an easy little snack, fun for your kids' lunchboxes, snack time or anytime.  I am using things up in my pantry and I challenge you to do the same, use things already in your cupboards or freezer, pantry, or wherever you may keep your food.  Don't let anything go to waste, go bad, or become unusable.  I don't think you can have too many of these quick snack recipes.  I feed people, it is what I do, so when someone is coming over.... forget about it!

Be ready to get addicted to this.  I always try to warn you but, I mean, it is the least I can do!


Let's get the show on the road.  
  • 5 cups oyster crackers
  • 1 cup brown sugar
  • 1 cup butter
  • 1.5 tsp cinnamon
  • 2 T granulated sugar
  • 1 tsp cinnamon
Get your oven preheated to 350F.  Line a cookie sheet with foil and set it aside.  Place the oyster crackers in a large bowl and also, set them aside. 

In a medium saucepan, combine the butter and brown sugar.  Once it is melted bring it to a boil and let boil for 2 minutes while you stir.  DO NOT, I repeat DO NOT forget you are dealing with hot sugar, and you WILL land in the ER if you try and taste this!  After 2 minutes, remove from the heat and add in 1.5 tsp cinnamon and the vanilla.  Stir until completely combined.  Pour over the oyster crackers and stir with a rubber spatula until the crackers are well coated.  Pour unto your cookie sheet and spread them out into as single of a layer as possible.  Bake for 10-15 minutes.  WHILE that is happening, mix together your 2T sugar and 1tsp cinnamon, you will need to sprinkle your crackers when you remove them with this mixture and let sit until cooled.  Break up the crackers and store in an airtight container or a Ziploc bag!

ENJOY!


Saturday, October 22, 2022

Witches Brew Snack Mix

Happy Saturday Friends!  Who celebrates Halloween?  While I don't celebrate it anymore, I knew someone would love an easy snack mix for the little ghosties, superheroes, and princesses in your life.  We can just enjoy it as a fun fall treat as well!


Did your mom or grandmom ever give out homemade treats?  I remember a year or 2 that my mom gave out caramel apples I want to say.  Maybe it was something else, but boy are those days gone.  Those are the first things that hit the trash (well right after 3 musketeers bars)!  Sometimes I love for the days of old but am always blessed and excited for the time I have been given by waking up each day.  

I have been a clown, cheerleader, referee, ballerina, little bow peep, did I mention clown?  Some of the costumes I remember as a kid.  There were things we were not allowed to dress up as, and we probably shouldn't have been allowed to dress up as. HAHA!

So, where I got this recipe.  My sister's mother-in-law came to visit, and she had a little breakfast get together at her house.  Her mother-in-law, queen of entertainment and games had this "thing" we were going to make.  I thought it was a beverage, but no, snack mix. HOORAY!  As she read off one ingredient at a time, oh wait, she had given us a Ziploc bag first thing.  THEN she read each ingredient as it was passed around the table, and you could take how much you wanted, etc.  I think I took 2 raisins which I switched out for chocolate chips in my recipe.  They really do look like bugs, and at 48, I am still not adult enough to get that out of my brain!  So, we continued with each ingredient until our mix was done.  Then we played a game seeing who could name the 10 body parts with only 3 letters and the winner got to add whatever ingredient they wanted to their bag.  Btw, you think this is an easy task, naming 10 body parts that only have 3 letters.  Guys, the M&M's were staring at me, my favorite ingredient was on the line, and I biffed it!  BAD!

I am going to insert your ingredients and their "Halloween" names.  This would be fun to play with kids or to serve with the written recipe stuck in it!Either put this into individual bags, or into a large bowl with an airtight lid!

ENJOY and don't let the blood drops drip!  Chew your chicken toenails well and PLEASE don't choke on the bat bones!


Tuesday, October 11, 2022

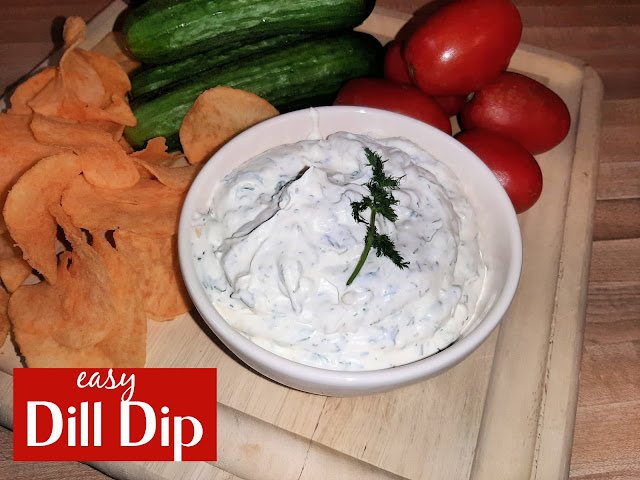
The EASIEST Dill Dip

Goooood Evening!  It is me again, a new recipe, an easy versatile recipe that I thought you guys might like.  We got some fresh amazing dill at the farmer's market a few weeks ago and my husband had asked for pickles AND dill dip.  I couldn't think of two things I like better with dill so I got the pickles done and set off to make my own homemade dill dip.  Homemade is just best, don't you agree?  I like controlling what is in our food, real food.  Just reading the ingredients on any product in the store gives me anxiety.  What is that?  Is that a fancy name for bugs?  Is that sawdust?  Yeah, I just prefer homemade whenever possible.  I mean I am a food blogger and recipe developer.....kind of a requirement that I love cooking!  Honestly, like anyone else, sometimes I don't love cooking and baking.  Sometimes I want to take 3 days off from making dinner and I do.  Anyone else go through short periods of time like this?

Well, along with the dill, I found delicious tomatoes, and baby cucumbers for dipping in said dip and so I got started.  Pretty easy.  Kind of all of the usual suspects of dill dip but I just did the measuring for you!  As with any recipe of mine, always, ALWAYS adjust it to your tastes.  Not big on garlic, add less.  No salt?  Add zero.  And so forth.  Here we go folks!  

Side Note: If you eat salmon, make extra, you might enjoy this shmeared on top or thin out with some milk and use as salad dressing, you are welcome!

  • 1 cup mayonnaise
  • 1 cup sour cream
  • 2 TBSP fresh dill
  • 1 tsp dried dill weed
  • 1 TBSP onion flakes
  • 1 tsp parsley (same amount dried or fresh)
  • 1 tsp garlic powder
  • 1/2 tsp salt
Combine all ingredients in a bowl with a lid.  Make sure all spices and herbs are completely mixed in.  Cover and refrigerate for at least 1 hour but up to 12 hours if you like!  The flavor will grow stronger the longer it chills!!


ENJOY!


Saturday, October 1, 2022

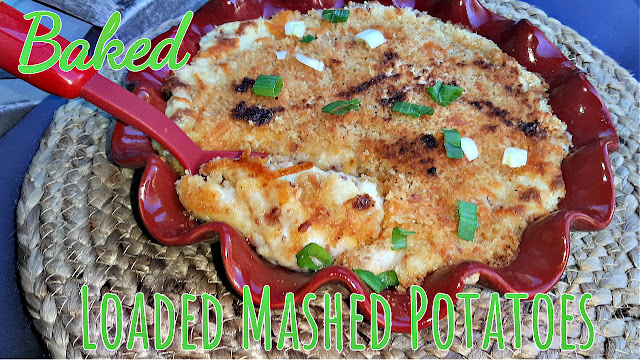
Loaded Baked Mashed Potatoes

 Good morning my friends, it is good to have you.  Welcome to my website!  Make sure before you leave to click the JOIN button!  No spam, no ads, and only an email update when I post if you wish!  I have over 600 recipes, here!  It kind of jars me to think about that number!

I pray this finds you all doing well and being happy!

This recipe is brought to you courtesy of my hubby.  He asked me if I could make mashed potatoes in the oven with bacon and cheese and something on top.... here it is.  These are AMAZING, and I am grateful he is so supportive and technically, my most viewed and popular recipe here on my website is HIS recipe for Baked Spaghetti and Stuffed Meatballs!  He knows his food let me tell you and I am never amazed at what he comes up with next!

Let's get to the recipe, shall we?

MASHED POTATOES

  • 4 med-large russet potatoes
  • 3 TBSP melted butter
  • 1/4-1/3 cup milk (depends on the consistency you prefer)
  • 1/2 cup chopped bacon pieces
  • 1 cup shredded cheddar cheese (reserve approx 1/4 cup for topping)
  • salt and pepper
  • 1 green onion
For the TOPPING:

  • shredded cheddar cheese (1/4 reserved from your 1 cup of cheese)
  • 1/2 cup breadcrumbs of your choice
  • 4 TBSP melted butter
Preheat your oven to 400 degrees F.  Get a pot of cold water, WELL salted, ready for you.  Peel your potatoes, and cut into about 1-inch pieces, they will cook much faster.  Keep them a pretty uniform size.  Bring your water to a boil and boil for about 10-15 minutes.  Check with a fork to see if they are done.  Drain and place potatoes into a mixing bowl.  Using a hand mixer, mash potatoes, adding in all of your ingredients, sour cream, milk, cheese, bacon, and pepper.  Mix until well combined.  Place into a buttered or sprayed (nonstick cooking spray) dish.  I used about a 9-inch round baking dish, use what you like.  Spread potatoes to cover.  Now, sprinkle your cheese on top evenly, sprinkle the breadcrumbs over the top, and drizzle it all with your melted butter.  Bake at 400 degrees for 25-30 minutes, until the top is golden brown!!!  When you remove from the oven, top with green onions and dig in!

Hope to hear from you if you try this recipe.  It is perfect next to a steak, a thick pork chop, a grilled chicken breast, and a salad!!

ENJOY!


Sunday, September 25, 2022

CheeseCake Fluff Dessert

YOU GUYS!  I uploaded this video and forgot to post the recipe!  There will be no awesome blog post, just that I can get this kind of "dessert" at a local grocery store and decided I had to try and make it at home!  I did!  I did!  I did!  Try it if you love cheesecake, especially light, creamy cheesecake!

FILLING:

  •  2 sm. boxes CHEESECAKE flavored pudding
  • 3 cups heavy cream
  • 1, 8oz container of whipped topping
CRUST:
  • 1 sleeve (10-12 crackers) graham crackers
  • 2 TBSP white granulated sugar
  • 1 cup melted butter
   Make crust in your food processor, or by hand.  Add all ingredients into processor or bowl and process or stir until mixture is the texture of wet sand.  Press into the bottom of a 9x9 or round baking dish.  Put about 1/4 cup of crumbs aside for garnish.

For the filling, add in pudding and heavy cream.  Beat for 3-4 minutes, incorporating as much air as possible into the mixture to make it light and fluffy.  Add in 1/2 of your whipped topping and beat it in to lighten the mixture.  Next, take a spatula and FOLD in the rest of the mixture.  When it is completely mixed, add the filling into the crust using a pipping bag or a spoon.  If piping it in, you don't need a tip, or you can use a Ziploc bag, but this step will make it extra light and fluffy, I promise!  When done, sprinkle with the extra graham cracker crumbs and chill for 1 hour.  Oh, NELLY this is awesome!

ENJOY!


Friday, August 12, 2022

Cinnamon Cream Cheese Sticks

 Happy Friday!  Finally, the end of the week!  Ready for a great weekend treat?  I figured out a way I could keep cooking hygienically without my bandages freaking me out!  A glove!  NOTE: In the video of this recipe, the blue glove made my camera go orange, I apologize and know that for next time.  


These are in an entirely different zip code of goodness.  My mother-in-law made these years ago when they were super popular, don't know if they still are but I have never made them, so I wanted to try it.  Super easy and oh so delicious.  You can't NOT love these, I am convinced!  Not only are these a perfect dessert or treat but perfect for a brunch or big breakfast as well!

I believe they are also known as "crack sticks or rolls", I don't care for that name, so I call them cinnamon cream cheese sticks.  Just as a side note!  Let's get this party started...


You will need:

  • 1, 8oz block of cream cheese at room temperature
  • 3/4 cup powdered sugar (confectioners sugar, icing sugar)
  • 1 loaf of white sandwich bread
  • 1 cup granulated sugar
  • 1 1/2 tsp cinnamon
  • 3/4 cup butter, melted

Preheat oven to 350 degrees F.  Flatten bread with a rolling pin.  You can cut off the crusts or not, I have never and will never cut off a crust!  Ok, I might but...  In a bowl using a hand mixer combine cream cheese and powdered sugar until a smooth consistency is achieved.  In a second bowl combine white granulated sugar and cinnamon, make sure it is also well mixed.  In a third bowl, simply melt your butter.

Now spread some cream cheese on your piece of bread, roll it up like you would a jelly roll, the cream cheese will hold it together, dip in the butter, then cover in cinnamon sugar and place on a baking sheet lined with parchment paper or a silpat.  Do this until you are out of cream cheese, I would say anywhere from 10-14 rolls.  Just depends on how generous you are with the cream cheese.  

Bake for 20 minutes and prepare yourself for a little bit of heaven!  Store in airtight container!

ENJOY!


Thursday, July 21, 2022

Ooey Gooey Butter Cake

 Am I the only person that was like 2 weeks ago old when they tried Ooey Gooey Butter Cake?  I have never had it and never made it.  True story.  Has anyone else never had it before?  My husband was quite literally horrified and after hearing about it, and how rich it is and buttery and everything good in the world I had to try it.  I had to find a recipe, and honestly who better to go to than that southern queen Paula Deen? I am admittedly not a huge fan, but I knew she would have the 411 on anything "butter".


I did step out of her recipe a bit but none the less, what I did was actually an option she gave in the recipe.  So this recipe is not mine, but it is mine in MY kitchen!  Thanks Paula, you do know your butter!  And in case you didn't know, these are actually bars and not a cake.  Fun fact.  Let's do this!


You will need for the "crust":

  • 1 white box cake mix
  • 1/2 cup or 1 stick of melted butter
  • 1 egg

Combine all ingredients in a mix bowl with a hand mixer.  You can use your stand mixer but a hand mixer works perfectly!  Mix until completely combined.  Pour into a greased 9x13 pan and using  clean hands spread it out to cover the entire bottom like a crust.  Set aside.

For the "cake" part, you will need:

  • 1 8oz block of softened cream cheese
  • 1 tsp vanilla
  • 2 eggs
  • 1/2 cup melted butter
  • 2 cups powdered sugar
In the same bowl you mixed your crust in.  Add in the softened cream cheese and mix for 1-2 minutes until creamy and smooth.  Add in the rest of your ingredients, vanilla, eggs, butter and mix again until combined.  Now add in your powdered sugar and mix until smooth and creamy, scraping down the sides a couple of times.  Pour over crust and spread evenly.

Bake at 350 for 40 minutes.  DO NOT OVERBAKE or you will ruin the wonder of this cake!  Let sit for 30 minutes before cutting.  That is MY recommendation.  We think these are WAY better cooled than warm.  You be the judge though!  

These will become a fast favorite in your house.  They are SUPER rich and sweet, a small piece will do ya'!

ENJOY!


Monday, July 11, 2022

Ravioli Lasagna

 Ready for another easy recipe?!  This was a family favorite back in the day and I just started making it again on occasion.  It is easy, maybe a good one to get the kids in on.  I have said it before and I will say it again, getting your kids in the kitchen to cook WITH you will make them much more willing to eat food they think they don't like.  Stop the whole chicken nuggets, frozen pizza, cereal thing if they don't like what is being served for dinner, get them to try new food.  I apologize if this offends anything but, it is exactly how I feel, add a face in my hands emoji and it is spot on.

You can easily add some fresh spinach into the cheese filling, some grate veggies, or whatever else you can think off.  Bump it up wherever you can in nutrition.  You know the second you tell the kids you are having ravioli for dinner, they are going to be all in anyway.  You can do it mom and/or dad!


Here is what you will need:

1-2 1lb bags of frozen ravioli (I use beef, use whatever you like)

1 cup ricotta cheese

3 cups mozzarella cheese divided (or more :) )

1/2 tsp salt

1 tsp Italian seasoning

1 jar of marinara or 4 cups homemade


Preheat oven to 400 degrees.  Spray your 9x11 baking dish with nonstick cooking spray.  I used parchment on the bottom.  In a bowl combine ricotta cheese, half of the mozzarella cheese, Italian seasoning and salt.  Mix until combined completely.  (This is also where you could stir in spinach, etc)  Set aside.  Start laying out your frozen ravioli until the bottom is covered. Spoon the ricotta cheese mixture over the ravioli and spread out.  Pour half of the marinara sauce over the cheese mixture and spread out evenly.  Now add the next layer of ravioli, if you only have one bag, it may be sparse but don't quit now!  Pour over the last of the marinara sauce, top with cheese and cover tightly with foil.  Bake for 40 minutes covered, remove foil and bake another 10 minutes to get the cheese good and golden and bubblahhhhh!

Serve, and enjoy!


Thursday, July 7, 2022

3 Ingredient Queso Dip

Happy July!  How did we get here so fast?  At the same time, we are closer to Fall!  Mild temps, open windows, crisp fresh air, all the feels going on here since it is currently 62 degrees F in my home.  

My husband's birthday is in a couple of days, and I like to spend a few days leading up to it making all of his favorite things. This dip is one of his favorite things. He is a dipper from way back.  He will dip, spread, slather and dunk, all things and into all things.  I think he could eat ______ and dip for nearly every meal!  And don't get me going on condiments, he has all of them, from every country and he is not afraid to try anything.  I love that about him.  So, with all of that said, we had chips and dip, and since we didn't eat nearly all of it, we put it in the freezer because it freezes like a dream.  Take it out and microwave or heat on the stove to enjoy it again and again!

While you may not enjoy using or eating Velveeta, this recipe can't be made without it.  This is not the time for real cheddar etc.  I am sure you can find those recipes out there, but this one, this one is not it.

Here is ALL you need!

1 2lb block of Velveeta Cheese

1 24 oz jar of any salsa, we use chunky

1 lb. browned ground beef, seasoned or unseasoned we use my homemade Taco Seasoning

Set your slow cooker to low and add in your cheese, cut into chunks, salsa and drained ground beef.  Place lid on and let it cook/warm for 2 hrs.  You can stir at 1 hr. and then again at 2 hrs.  Once the cheese is all melted and it is mixed thoroughly, put your slow cooker on the warm setting and enjoy it warm all night or day long!

NOTE: If you like your queso a bit thinner, add in 1/4 to 1/2 cup of milk.  Stir it in and enjoy!

This is also awesome ladled over burritos or enchiladas!  Freeze any you don't use!

Thank you for your never-ending support and friendship.  I appreciate you and feel free to leave me your comments!

ENJOY!


Monday, July 4, 2022

Ramen...at HOME!

 Ok, I get it, you were hesitant to even click on this let alone read it.  But come on, it won't take too long and you might just enjoy it!

I am a closet ramen lover.  Not even closet, it is what it is.  It is sodium laden so I had to find a way to make it at home, as good as at a Ramen Bar or Noodle Bar.  I learned to add things, take away things.  I mean why am I so ashamed of loving ramen?  I have been a noodle girl since birth, but, it is what it is.  I had a recipe/article published on Fox News Magazine Online featuring my Asian Chili Ramen Wrapped Shrimp.

I wanted ramen to be able to be eaten without the stigma of being TERRIBLE.  We are a country experiencing unreal inflation in the cost of food.  People need to be able to buy more budget friendly food to spread out the healthy food and use up food instead of throwing it away.  This "recipe" if you will, does all of that.  A ramen bar or noodle bar will easily cost you 50.00 or near that.  Sometimes we want it at home, and here is how I do it!

I am going to base this on 2 packages of cheap ol' ramen.  Ready?  Here is what I had in the fridge this day that needed used, carrots and celery.  I thought I had a small head of cabbage but it had gone way to far to the other side to be salvaged.  I make the soup as directed but use only one packet of seasoning, just one.  Add both if you like.  I also had a little piece of round steak left from a meal earlier in the week, and so I sliced it up thin and threw it in as well.  Add some ginger if you have it, literally whatever you have.  If they are already cooked add them in at the end, and if raw, follow my video.  You are getting the delight of those long slurpy noodles AND fresh veggies and protein.  Add in a beaten raw egg at the end of cooking, or any meat or no meat.  Tofu?  YES!  

Just like I use leftover cooked veggies for veggie soup, I use raw for ramen.  Just kind of as a guide.  There is absolutely no measurement, not too much, not too little, none of that.  Add in as much as you can cook in the pot!  I use some soy sauce, low sodium and like I said, omit the second package of seasoning but if salt isn't a concern for you, no worries.  


I hope you enjoy!!


Monday, June 20, 2022

Easy Slow Cookier Lil' Smokies

Summertime, summertime, sum-sum-summertime!  All the summer things happening!  Outdoor concerts, BBQ's, gatherings, swimming, and the list goes on.  I momentarily thought I was 10 again and ALMOST hit up a slip and slide.  One of my childhood favorite activities.  We didn't have the money to buy the REAL deal, but we had even better....  Let me set the scene.  My dad would buy a roll of plastic at the local lumberyard each fall to cover the very OLD windows on our 7-bedroom house with an amazing 6 ft. clawfoot bathtub, a kitchen for 12 that was about 6X7 and the best wrap around porch this side of the Mississippi!  He would take what was left, and sometimes add more, and lay it out in our long backyard.  He would run the sprinkler, the kind that fans out, and we would slip, and slide half a city block I swear.  We had the MEGA TONKA version of the Slip N' Slide, and it was awesome!  We always found ways to have fun.  We swam from sunup until sundown, had to be home when the streetlights went off and our bikes in the yard.  Those were the good old days, weren't they?  Neighbors on a walk, stopping by for iced tea on the porch, poured straight out of a Tupperware pitcher, you know the ones. God has certainly blessed me in my life, so I shall be grateful for NOW as well.  

Anyway, this morning as I am typing this up, it will be over 100 today and what better time to get some good use out of that slow cooker it took me years to make friends with?!  Perfect to cook things low and slow, AND to avoid heating up the house with the oven on, right?  This recipe is so easy and probably 98% of you know it, make it, or have at least eaten it once.  But you know what?  There are very beginner or kid home chefs out there (and other countries) who might need something easy to start with or even someone who has perhaps forgotten how good these are!  I have a little mid-size slow cooker because I am not about to dirty my regular size one for such a small amount of food.  I mean big batch, sure, this size no way!

Here we go, Lil' smokies, every football party across America serves them!  WITH a toothpick! THREE ingredients!

  • 1 cup of your favorite BBQ sauce (I only like Cookies which is probably, maybe a Nebraska thing only)
  • 1 cup grape jelly
  • 2-14oz pkgs Lil' Smokies of your choice

I like to mix the sauce separate.  Put the little smokies in your slow cooker (or simmer for an hour on low in a regular pot or in the oven at 300).  Mix up your jelly and BBQ sauce well and pour it over the top.  Mix to combine or let it slowly warm and drip down after heating and don't stir at all!  After 1 hour in the slow cooker, stir well.  Let go another hour or 2 before serving.  Make sure to put out toothpicks next to the paper plates for serving!

NOTE: I don't like my Lil' Smokies to saucy, but feel free to add more jelly and BBQ sauce to yours!  They WILL give off some juice of their own so if it feels like not enough sauce, it is!


Wednesday, June 15, 2022

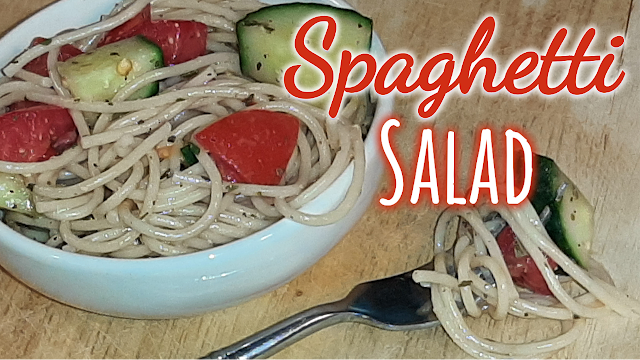
Spaghetti Salad

It is a BEAUTIFUL day here in the Midwest!  Bad storms last night led to perfect weather today, I hope you are all having your own "perfect" weather.  It sure does lift your spirits, doesn't it?

I am so ready for some picnics, BBQ's and the like.  This is a salad I actually adapted from one I got from my friend Lisa.  She gave me a list of ingredients that is traditional in her part of the country, and I redid it in a way that my husband and I would enjoy it.  Oh boy, is this a good one.  No worries about mayo-based salads getting to warm, etc.  Besides, do we need more mayo-based salads?  No.  Not for me anyway! I will also link the YouTube video that goes with this at the bottom.  Make sure to SUBSCRIBE there if you aren't already!  Also, click the notification bell and select ALL to be notified each time I upload a video!

Ready, spaghetti?!? 

  • 1 lb. spaghetti (broken in half if you choose and cooked)
  • 4 Roma tomatoes
  • 1-2 cucumbers (mostly peeled)
  • 2 tsp homemade pizza seasoning (or Italian Seasoning) there will be a difference
  • 1 tsp dried basil (4 or 5 leaves of fresh)
  • 1/2 tsp dried parsley
  • salt and pepper to taste
  • 1 cup creamy Italian dressing (I prefer Aldi version of Olive Garden Original)

Cook your pasta and run cold water over it.  Make sure you salt your water as well.  Drain well and then add in cut up tomato and cucumber.  If you do not use my homemade pizza seasoning, you CAN use Italian seasoning but there will be a difference in flavor.  Not bad, just different.  My pizza seasoning had extra flavors not in a regular Italian seasoning.  Add in basil, I use my home dried basil, as my basil plant outside isn't worthy yet! 😁 Add in salt and pepper to taste and 1 cup of dressing.  NOTE: you will likely need a bit more dressing when it is time to serve as it sits, the spaghetti will soak up the dressing and you don't want it dry, as much as you don't want it swimming in dressing.  Refrigerate for at least 2-4 hours before serving.  

PS. If you want to serve this withsome small balls of fresh mozzarella, I won't tell if you won't tell.

Tuesday, June 7, 2022

Caramel Apple Turnovers

 Good Day Friends!

WHOA!  Long time, eh?  I can't believe it is summer and the heat has already set in big time!  Summer fun has begun and we are already complaining about the humidity!  Dang midwesterners!

By they way, below you will find a link to the YouTube video that goes with this recipe.  Please consider subscribing and clicking the bell icon so you are notified each time I upload!  Thanks SO  much!

Of all things that I could make for you, I picked something not very "summery".  These may remind you more of fall but in our house, they are served with ice cream and I just can't do ice cream except for summer.  Is that weird?  I mean, I think it might be, but it is seriously the truth.  To be completely honest, ice cream isn't really my "thing".  I like it, but could definitely live without it too!

Here is what you will need for this recipe.  It will make 4 "turnovers that aren't turned over at all!

  • 1 roll big flaky crescent rolls (refrigerated)
  • 2 apples
  • 2-3 caramels per turnover
  • Cinnamon

Preheat oven to temperature recommended on the roll of crescents.  You will also use the recommended time to back these.

Chop apples into small pieces like I did.  If you prefer just slices of apple you can do that as well, it may make sealing them easier for you.  When you are done roll out 4 of your crescent rolls and run a rolling pin over them a couple of times for maximum surface!!!  Add your apples, sprinkle cinnamon, and if you aren't using a sweet apple, sprinkle in a little brown sugar as well.  Nestle in 2 or 3 caramels, take another crescent roll and lay it on top and seal the edges with a fork.  Place onto a parchment lines cookie sheet or sprayed with nonstick cooking spray.  Just before popping them in the oven, spray with nonstick cooking spray on top, or brush with an egg wash (egg whisked with water) or melted butter.  

Place into oven for 15 minutes and smeeeellllllll-ellllll-ellllll what you been cookin'!!!  If you know, you know.........

I hope you give this a try and that you love it as much as we do!  Don't limit what you eat according to seasons, make what you like, when you like!  Need to go check my simmering bone broth.  It is only like 95 degrees, what is the big deal?

Your Chefwannabe, 


Wednesday, February 2, 2022

Mexican Rice Remix!

 Hello my friends!  So good to have you back and to share another recipe.  If you have been with me a long time, you may remember my first Mexican Rice recipe... Still amazing, but I wanted to change it up a bit.  Change is good.  The older I get the harder it gets though!

This is a super easy recipe.  In no way do I claim it to be authentic, it is just what we love and that is all the authenticity I need on this one!  Do you all make Mexican Rice?  It is just a given for us on taco, enchilada, fajita, or quesadilla night, we have rice.  You probably add beans as well.  We aren't bean eaters in this house, but, if we were....I would add beans!

Here is this super easy and absolutely delicious recipe!

You will need:

  • 1 heaping cup of long grain rice
  • olive oil
  • 1/2 cup chopped bell pepper (any color)
  • 1/4 cup salsa
  • 1 chopped tomato
  • 15 oz. can of tomato sauce
  • 1 cup water
  • 1 tsp chicken bouillon powder

In a higher sided skillet, add in olive oil.  Just enough to brown up the rice.  Add in rice and let it slowly begin to brown.  While it is doing that chop your peppers and tomato, add into rice.  Mix thoroughly and add in chicken boullion,  Mix to combine and add in tomato sauce, water and salsa.  Let come to a boil.   (You can also mix this together separately like I did)  Mix until completely combined and put the lid ON.  Turn your burner to SIMMER and DO NOT REMOVE the lid for 20 minutes!  When you remove your lid, your rice will be perfection.  Give it a stir and serve.  WHOA BABY!  Oh, it is so good!

I hope you enjoy and tag me on IG, FB or anywhere else if you make it!  I want to see those photos!


ENJOY