Wednesday, July 31, 2013

Geo's Famous Spice Rub (All Purpose)

Brrrrrr!!  Yes, I am serious, it has been CHILLY here in the big O!  Mother nature has straightened herself out but I will take a 53 degree morning ANY July day!! 


As most of you know, my husband is not only supportive of my blogging habits,  he loves to take part whenever I ask him too.  Is it genuine?  I am not sure.  I think he loves to take part because in his mind, he thinks one of HIS recipes is going to change the world.  He reminds me often that my most popular recipe is actually HIS recipe.   Do you know what it is???  You can find it here.   HA!!  Really he does love to cook as much as I do,  and he is a real "rubber".  I mean, let me clarify.  While he does give the BEST nightly foot rubs (for 13 years now, EVERY night), I mean this in an entirely different way.  He has made this spice rub for as long as I can remember.  He started out basic and used Alton Brown's spice rub method/ratio but over the years he perfected it to his taste and to the taste of many who constantly mumble while eating, "OMG, what is ON this".    We have switched up, switched down, omitted totally and doubled ingredients until he got this perfect combination of sweet and spicy, but not TO spicy.   I think he finally perfected it about 10 years ago.  Perfected it in OUR opinion anyway!  He uses this for pork, beef, chicken and has even used it on fish and to flavor hamburger for any number of things.   This sandwich you see pictured above is probably my favorite way, which is why I chose it to be the vessel for the rub!  You can't beat it with a stick, fresh tomato, some butter lettuce, a grilled bun, I mean get outta here.  He even used the rub to flavor his mayo for slathering on the sandwich. 

You can rub your meat and let it sit for hours, or days.  Yes, I said days.  We rubbed this chicken and let it sit about 5 hours, but the longer it sets, it changes the texture of the chicken to a tender beautiful thing.  We have let things marinate in this for days.  Ribs, steaks, etc, we prep a few days ahead and there ya go.  It is up to you how much flavor you want your food to have but I promise even just an hour will change your life!  We use cheapo dried herbs and spices, so hit up someplace cheap! 

While I would like to let him take the keyboard and blow himself up into the king of the rub, I am writing this while he is at work so he can't.  But the truth is, he IS the king of the rub my friends!  Here is how he makes it!

4 cups brown sugar
1/4-1/2 cup salt
1/2 cup chili powder
1/4 cup of the following:
cumin
garlic powder
paprika
onion powder
seasoned meat tenderizer
Italian seasoning
1/4 cup crushed red pepper flakes (this is optional and the measurement is up to you, more or less if you wish but we find this perfect)

Combine all ingredients in a Ziploc bag and smoosh to combine.  Break up any bits of brown sugar and make sure all ingredients are well mixed!!  Store in an air tight container or Ziploc bag in your cupboard for up to 4-5 months!!  (we usually make a double batch)

Now to get this sandwich!

3 chicken breasts (cut in half so 2 fillets out of one breast, or buy thin cutlets or pound these thin)
1 sliced tomato
1 head of butter lettuce
6 large rolls, butter or oiled and grilled on both sides.

In a large Ziploc bag pour 1 cup of of your dry rub.  Add in 3 (cut into 6) chicken breasts.  Close up your bag and smoosh until the chicken is completely covered. 


Put in the fridge to marinate however long you want it to go!  Before grilling, just butter or oil your buns and grill or toast on both sides.  Set aside.  Grill your chicken breasts for approx. 3 minutes per side.  I used my George Foreman and cooked them 4 minutes total.  They were perfect!


Stack on your bun with any veggies you like, (or cheese).  Enjoy a beautiful sandwich!!


Your "wants a foot rub while I eat my dry rubbed chicken" Chefwannabe


Monday, July 29, 2013

No Bake Cookies

Time for some old school treats!  These are from way back, and I am sure most of us have had them.  I, however, haven't had them in a hundred years, (at least) and as a request from my practically perfect husband, I was obligated!


I associate these particular cookies with the over 80 crowd.  I used to occasionally attend a friends youth group with her as a young teen and there was a bible study that met at the same time.  We got to share their treats and they always had these.  They were a fairly elderly group and I guess I thought they were easy to gum.  Ok I totally didn't mean to make that sound mean, but it does.  But it is the truth, that is how I thought of them when I was young!   I don't know if my mom ever made them but I am certain one of my sisters did, or a friends mom did.  I have a couple of "cookie queen" sisters, sadly they are also the "all things salads" sisters.  A blessing and a curse, I tell ya.  While most of you have probably made these and have a recipe you use, I decided to share them anyway, for my "outside the US" readers and my readers who are beginners.  This is a perfect recipe for kids to help with.  Seriously though, get your kids in the kitchen turn on some good music and shake and bake baby!

No Bake Cookies
1/2 cup butter
1 cup peanut butter (crunchy or smooth)
2 cups granulated sugar
1/2 cup cocoa powder
1/2 cup milk

Combine all ingredients in a medium saucepan.  Bring to a boil, do not burn!  Take off the heat and add...

1 tsp vanilla
3 cups old fashioned oats

Stir until combined.  Scoop or spoon onto a parchment or wax paper lined cookie sheet.  Refrigerate or let sit for 1 hour.  Makes about 3 doz, depending on the size. 

Your "loves the over 80 crowd, right mom?" Chefwannabe


Wednesday, July 24, 2013

Spicy Turkey Meatballs

Ahh, summer!  The season of parties, get togethers, family reunions, and all things party!  Is it any wonder you can't wait for school to start, just so you can slow down?  It is like needing a vacation from vacation.  Seems the summers are as busy or busier than any school year.


Do you always bring the same thing to parties?  You know the parties where you are asked or expected to bring a dish, or an appetizer, finger foods, etc.  Are you always pressed for time, or ideas and just end up stopping at the market on the way and buying something?  I will admit, it has happened to me a few times.  Sometimes it ISN'T my fault.  Just to clarify.  Regardless I am as guilty as the next guy for running into the store for some chips and salsa, chips and dip, some salad (gag), or a mix of all of the above.

I think it is important to have a few of these little party recipes in your arsenal, don't you?  These little cocktail meatballs are perfect, in a bowl, in your crock pot.  Yes, I said CROCK POT.  Smack a small cup of toothpicks by it and call it a party!  My husband thinks would go good on a little toasted roll for sandwiches as well.  They definitely have a kick, I rarely give you spicy recipes, but this one, you can adjust the amount of heat, but come, just do it!   These are quick and as I mentioned, you can simmer them on the stove, OR throw them in your crocky and set it and forget it!

Meatballs (makes 36 meatballs)
1 lb ground turkey
1 egg
1/4 cup breadcrumbs
1 1/2 tsp horseradish (not the sauce)
2 tbsp. grated onion
1/2 tsp black pepper
1 tsp salt
2 tsp hot sauce (I use sriracha)
2 tbsp vegetable oil

Preheat oven to 400 degrees F.  Mix all ingredients until completely combined.  Form into meatballs and place on cookie sheet.  Bake for 10-12 minutes. 


They may NOT be done all the way at this point but it is OK because they will simmer in the sauce at least an hour where they will finish cooking!

Sauce
1 cup catsup
3/4 cup water
2 tbsp. brown sugar
1/2 cup of you favorite BBQ sauce
1 tsp yellow mustard
1/2 tsp hot sauce
1/4 cup vinegar

Combine in a medium saucepan and bring just to a boil, add meatballs and turn to low, cover and simmer for at least 1 hour.


If using a crock pot, prepare sauce in the crock pot, turn to low and add meatballs, let go for 4 hours, you can serve right from the crock pot as well!
This is just one of those dishes that gets better the longer the meatballs sit in the sauce.  Make them the night before and reheat the next day even!

Your "pickys are my favorite kind of food" Chefwannabe

Monday, July 22, 2013

Cottage Cheese Jello Salad

Ahhh, the oldies but goodies.  I can't believe I haven't shared this with you.  Well, I kind of do know why.....


My mom has made this salad as long as I can remember.  I mean like, WAY back in the day.  As a mother of 10, she made what was quick, cheap and convenient.  Many times that included various salads.  Some of them, I can't believe she put in front of us.  One in particular, was this heinous jello that had grated carrots and cabbage in it and some mayo concoction on the top.  OMG.  Tell me nobody else was subjected to this salad?!?  I am just not much of a salad girl in general.  A salad, to me, involves leafy greens, tons of veggies, some protein and well, you get my point.  I have a couple of sisters who are the queens of "the salad".  I believe there isn't a single salad they haven't tried making.  You know those "salad luncheons" they used to have or maybe sometimes still do?? Yeah, that is my worst nightmare. 

Anyway, this salad does use Cool Whip.  I KNOW what is in it.  I know some of you refuse to use it.  That is fine, use heavy cream and sweeten it up and whip it up and you are good.  I, however, am sharing this recipe just as my mom always made it.  The good, the bad and the ugly!  But how can you even argue with 4 ingredients?  Convenient?  Definitely

Feel free to change your jello flavor however you want.  I remember her using mandarin oranges in this as well, instead of pineapple sometimes and sometimes she would leave the fruit part out all together.  This will seem loose when you mix it together but it will firm up in the fridge.  Just FYI.

You will need:
24 oz container of SMALL CURD cottage cheese
8 oz of cool whip (or use 1 cup of whipping cream and 1 tbsp. of powdered sugar and whip it up)
3 oz box of strawberry jello
20 oz can of crushed pineapple, drained.  (save that juice!)

Combine all ingredients in a medium size bowl.  Umm, that is all.  Cover and refrigerate at least 2 hours. 

This is a perfect summer salad.  If you are into that sort of thing and even though I loathe cottage cheese, I kind of am "in" to this one!

Your "can I get the number for salads anon for my sisters" Chefwannabe

Wednesday, July 17, 2013

Homemade Ricotta Cheese

Good evening friends!  Hoping this finds you all doing well and enjoying your evening!!


This cheese making thing, is getting a little out of control.  First hubs and I made mozzarella cheese, we have made it several times.  He has been on me about making ricotta cheese forever.  He LOVES ricotta cheese.  Not my favorite, but I get that he enjoys it.... immensely. 

I wish I had 1.00 for every single time I put him off about this.  I used every excuse in the book, from "it will be to hard" to "why can't we just buy it in the store" to "NO, I am NOT making ricotta".  Well finally he was done taking no for an answer.  I mean, he is a HUSBAND, shouldn't he be able to take NO for an answer? :)  Anyway, I gave in.  We looked up all kinds of recipes and techniques.  I can't believe the variance from super easy recipes to super involved recipes.  We ended up going with a recipe from epicurious.com for our first ever ricotta cheese making adventure.  It was easy, took no special equipment, other than needing to pick up some cheesecloth we were ready to go.

I will tell you in advance, this cheese was SO incredibly delicious, I will likely never buy it in the store again.  Not only was it delicious, but I knew exactly all 4 things that went in it!  How can you argue with that?!?

You will need:
1 large pot
cheesecloth
colander
1 1/2 tsp salt
1 gallon whole milk
2 cups heavy cream
6 tbsp. fresh squeezed lemon juice.  (do NOT use the stuff in a bottle)

Place cheese cloth into the colander and set in the sink.  Make sure you cut the cheese cloth bigger than you need so it stays put and cover the entire colander

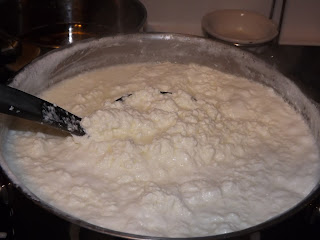
In a large pot, add in milk, cream, and salt.  Bring slowly to a rolling boil.  This might take a bit!  Be patient. 

When it is at a rolling boil, add in the lemon juice and turn off the burner.  Let it sit for approx. 2-3 minutes.  You will see it curdling immediately.


When you think it is curdled as it should be, pour into cheese cloth lined colander and let drain. 


The longer you let it sit and drain the dryer your ricotta will be. 

This yields 1 qt of ricotta.  (at least it did for us).  Refrigerate at least 4-6 hours.  Let it cool completely and then use however you choose.  Use it savory, use it sweet, the options are endless.  This is the best thing goin' and I can't WAIT to make it again and again!  Funny how things change, eh?

Your "admittedly likes making ricotta" Chefwannabe


Monday, July 15, 2013

Easy Shrimp Scampi (No Alcohol)

I always hate it when I watch YouTube videos and they use the phrase, "highly requested".  Seriously if everything has been so highly requested for years, why are you  just making it now?  OK, annoyed comment, over. 


I have had a few requests.  Namely, shrimp scampi with no alcohol.  Many people don't drink it, don't like it, etc.  Yes, I say the alcohol all cooks off, but for someone who doesn't like it, it doesn't matter. he flavor is concentrated so it is even stronger.   I admittedly don't like alcohol in most of my dishes.  I have a couple I can't do without on but, for the most part, I don't use it a ton.  My husband doesn't groove on it and I am finding more and more people who don't.  So regardless of your reasons, here is an easy recipe, alcohol free, that my husband thinks is the cat's meow.  Well, so to speak.

This is so easy it is ALMOST embarrassing.  I serve this normally over some angel hair pasta, but this day, my husband wanted it plain.  You can serve it with rice as well.  Just PLEASE don't forget some crusty bread too!  Buy your shrimp however you choose, but they need to be peeled and in my opinion, deveined.  Mine were shell on, but they were deveined, so all I had to do was peel them.  Your seafood counter at your store, will likely have several options for you.  You can use fresh or frozen, just let them thaw if they are frozen, in cold water.

I don't normally let my garlic and butter simmer for so long, but in this dish, for me, it is imperative. 

Here is what you will need:

1/2 lb shrimp (peeled and deveined)
3 tbsp. butter
1 heaping tbsp. FINELY MINCED garlic

That is it.  Seriously.  I don't even salt and pepper.  In a COLD medium skillet, one your shrimp will cook nicely in, add in butter and garlic.  Turn your burner to medium-low and let the garlic and butter come up to heat together.  DO NOT turn it to high, just let it lovingly dance together in the pan, for a good 5-7 minutes.  LOW and SLOW.  This is what gets the garlic good and infused in your butter and turns your butter 50 shades of sweet and delicious!  After that time has passed, turn to medium heat and add shrimp.  You can increase the temp of the skillet if needed, a LITTLE if you need too.  Cook until shrimp are pink on one side and flip them over.  This will take maybe 1 to 2 min per side depending on their size.

Serve over some hot pasta (I prefer angel hair) with some crusty bread!

PS.  If you WANT to use white wine, add it just as the shrimp are halfway done.  1/4 cup will do ya. 

Your "do NOT burn the garlic or you need to trash the whole thing" Chefwannabe

Thursday, July 11, 2013

English Muffin Bread

Yes, you read it right.  This bread is the bomb.  Here is how I found out about this bread.  I was perusing the bread store a few months ago and they were out of the bread I wanted.  I came across this bread that looked like it might work, didn't even look at the name of it when I bought it.  I got home and when I took it out of the bag, I wondered what in the heck I bought that for, and then realized it was the bread I picked up in place of my regular bread.  I toasted some up, slapped on a little butter and topped it with a poached egg.

I
Can
NEVER
Live
Without
This
Bread
AGAIN!

I don't know why.  Some questions can't be answered in words.  They have to be tasted.  It has a beautiful course texture and the way it crisps/toasts up is just a beautiful thing!


I went back last week and they no longer carry it.  WHAT?!?  I almost threw a tantrum much like a 4 year old, I didn't, but don't think every ounce of my being didn't WANT to.  So now what do I do?!?!  Ohhh yea, I make my OWN.  Duh.  This recipe is from the King Arthur website.  I just googled a recipe and tried it.  VERY easy, very, very easy.   Yea, pretty awesome in my opinion.  So if you decide to make it, let me know what you think.  I am making another loaf this weekend.  Put a poached egg on top.  Trust me.  I am going through some major poached egg phase, it is a little out of control but, hey, it is what it is.  Get these things together.....

3 cups all purpose flour
1 tbsp sugar
1 1/2 tsp salt
1/4 tsp baking soda
1 tbsp instant yeast (this is one of those little envelopes worth)
1 cup milk
1/4 cup water
2 tbsp vegetable oil
cornmeal (for dusting)

Preheat your oven to 400 degrees F.  You could wait and do this while it is rising but I always do it first or I forget.

Mix in a large bowl, the flour, sugar, salt, baking soda and yeast.  In a separate bowl mix together, milk, water and oil.  Microwave it until it reaches 120 degrees F.  Stir well before taking the temp, as the micro causes hot spots and you want an accurate reading.  IF you do not have a thermometer, stick your finger in, it should feel hot, but not so hot you couldn't take a bath in it.  That sounds odd, but, it is how the King Arthur people say to do it if you don't have a thermometer so take it up with them!

Now pour the hot liquid over the dry ingredients.  Beat on high for 1 minute.  The dough will be soft.  Now transfer into a greased and dusted with cornmeal loaf pan.  Level it out as best you can and cover.  Let it raise until the dough comes to the top of the pan.  Bake for 22-25 minutes.  Remove from oven and let cool 5 minutes before removing and cooling on a cooling rack.  Let cool completely before slicing. 

Trust me, your bread life, will NEVER be the same!

Your "poached eggs on toast for every meal lately" Chefwannabe


Wednesday, July 10, 2013

Creamy Broccoli and Cauliflower Salad

I have made it a point to open my mind up to salads.  You may or may not know, because I MAY or may not have made it clear how I feel about salads and casseroles.  Don't give me any flack, I know, I know, most of you love them both.  But if you read the first sentence, you will see, I SAAAAIID, I am opening my mind.  Albeit, slowly, I AM opening it. 


This is another summer salad.  In my mind, some salads are for winter and some are for summer.   Remember the heinous cabbage, carrot, jello salad I mentioned before?  Yea, that graces the table at Thanksgiving only, so, a winter salad.  This is one that I think would be great for your garden produce and has some nice crunch and texture.  This is a bit of a "take" off of a recipe I have seen at many a potluck, many a funeral dinner, and many a family get together.   As I have mentioned before,  I come from a family of salad lovers.  I mean, REAL salad loving peeps.  I sometimes shutter at what the next salad might consist of.  Dramatic?  Maybe.  But, true. 

This salad needs to chill an hour.  More is fine, less is probably fine, but, an hour seems to make it perfect to me. 

Some people add raisins or craisins.  I won't even go any further into it, I loathe both, and thus, did not write them in, because this is MY version and NOTHING in my life, includes either raisins or craisins.

You will need:
1 medium head of fresh broccoli, cut into small florets
1 medium head of cauliflower, cut into small florets
3/4 cup good quality bacon bits or fry your own
3/4 cup sunflower seed kernels
small red onion, finely minced

Combine all ingredient in a large bowl.  Set aside to prepare dressing.

Dressing:
1/2 cup sour cream
2 cups salad dressing
1 envelope of ranch dressing mix

Mix in a small bowl until all ingredients are well combined.  Pour over the veggies and toss. 

Chill 1 hour. 

 
Your "do you tell your kids broccoli is little trees?" Chefwannabe

Tuesday, July 9, 2013

S'More Sandwich Cookies

S'more season is here!  Wait, is there any wrong season for s'mores?  I don't think there is.  These all American treats are a favorite of young and old alike.  Regardless if it is over the campfire, over the stove, or in the microwave, people will do about anything for a good s'more. 


I came up with this recipe recently.  I was helping my sister  (number 1) overhaul her kitchen.  I know, I know, I am an awesome sister.  But that aside, when we were sifting through her COPIOUS amounts of cookie cutters, and got to the bottom (30 minutes later) I found this recipe.  Not THIS recipe but A recipe.  It was for these cookies.  I had never seen anything like it.  My sister admittedly had written the recipe on the recipe card, "she has the handwriting of a serial killer" (name that movie) but had never actually made the cookies.  That was my signal to get on it.  3 ingredients, I mean, 3 ingredients?!?!  They turned out SO soft, I just had to make them into a sandwich cookie.  There is nothing you can do that will make these cookies hard.  It is my belief that you must have a soft cookie for a sandwich cookie.  I mean, who needs TWO cookies crumbling all over their chest and lap?  Notice I mentioned chest first?  It has nothing to do with experience.

Anyway, I did S'more Cookies, but there are a bazillion ways to change it up and out kids.  I found ingredients in the cupboard I needed to use up, so S'mores Sandwich Cookies were born, but see what YOU can birth from your cupboards.  Wow, that sounds all wrong.  But I know, that YOU know what I mean.  This cookie recipe makes about 5-6 dozen cookies, and they are awesome just plain.  So you will get half the amount in sandwich cookies. 

Chocolate Cookies
2 boxes devil food cake mix (or just plain chocolate)
1 cup vegetable oil
4 eggs

Preheat oven to 350 degrees F.  Mix all ingredients until completely combined.  Roll into 1 inch balls and place until parchment lines or silicone mat lined cookie sheet.  DO NOT FLATTEN.  They will spread a wee bit when they bake and cool.  Place them about 2 inches apart.  Bake 8-10 minutes, let cool on the cookie sheet for 5 minutes and then place on cooling racks.  Rinse and repeat until all cookies are baked!

For the rest of the recipe you will need:
1 cup graham cracker dust.  (yes I mean dust, or really fine crumbs)
1 tbsp chocolate jimmies to mix with graham cracker crumbs (completely optional)
10-12 ounces marshmallow fluff

I threw my crackers in the food processor to make quick work of dust making.  Use a Ziploc and something heavy to beat them into cracker crumbs.  Place into a dish, add jimmies if you choose and just mix them up and set aside.

Take one cookie, add fluff, enough that when you press the second cookie on top it will come out the sides a little bit, because that is what will hold the graham cracker crumbs on.  Roll in the crumbs and repeat until they are all done!


I would suggest refrigerating until you are ready to serve, or freeze them if you like in an airtight container.  If you leave them where it is warm or hot, and they don't get eaten quick, the tops will want to slide a bit as the marshmallow softens.  As if it matters, they are awesome!

Your "s'mores in the micro, desperate times call for desperate actions" Chefwannabe

Monday, July 8, 2013

Homemade Vanilla Ice Cream with Peanut Butter Sauce

Heaven, pure heaven.  Now I don't know how YOU feel about peanut butter, but let me tell you, we LOVE it.  My husband has been making this peanut butter sauce for years, and he and our son add it to shakes, dip fruit in it, etc. 


As for the vanilla ice cream.  Creamy, sweet, and decadent!  My husband said, "OMG, do you remember when Breyers was GOOD?  That is what this tastes like".  I guess that was a compliment.  I like knowing what is IN my ice cream and I enjoy the whole process of creating different flavors.   There is just little, in my opinion, that compares to homemade ice cream.  As a kid we would almost always make it on the 4th of July.  That was about the only time we did.  My dad would borrow someones ice cream freezer, we would continuously feed it rock salt and ice, we might get a crank one, that we had to crank or sometimes an electric one to plug in.  Granted, you can make a lot more ice cream with one of those full sizers, but my counter top version is perfect for me.  This is the one I have and I LOVE it.


IF you do not have an ice cream freezer, this can be made without it.  Put it into a container with a lid and freeze.  When it has been in the freezer for 1 hour, remove and stir it.  Do this again after the second hour.  Let freeze until it is at the desired consistency you want! I don't like sharing recipes that require specialized equipment.  It goes against my idea of sharing food that is accessible to real people, EVERYWHERE and without having to buy hundreds of dollars worth of specialized equipment.  I made 2, maybe 4, batches (lol), made half with my machine and half without, there is zero difference so I was very excited!

You will need to follow your machines directions on preparation of the equipment.  My freezer bowl has to be in the freezer 12-24 hours before using, so make sure to check that out!!

Here we go!!

Vanilla Ice Cream
2 cups heavy cream
1 cup milk
3/4 cup granulated sugar
1-2 tsps vanilla extract
pinch of salt

Combine all ingredients in a bowl.  Whisk until smooth and creamy. 


Cover and refrigerate for 1-2 hours.  Carry on with your ice cream makers' directions on freezing.  Mine took about 15 minutes, at which time it was like soft serve ice cream.  Since I wanted it harder, I put it into a container, covered, and put into the freezer for at least 2 hours, it can stay as long as overnight.  Proceed with the manufacturers directions on your ice cream maker

Peanut Butter Sauce
1 cup creamy peanut butter (you could use crunchy if you like)
3 tbsp. brown sugar
1 tsp vanilla extract
1 cup milk (any milk)

Combine in a small saucepan and heat until sugar is dissolved and peanut butter is melted.  Mixture should be smooth!  Remove from heat, serve over your ice cream warm or let it cool and use it cold, the choice is yours.  Store in the refrigerator in an airtight container.

(When you go to reheat this, you might need to splash it with a little milk to get it smooth and creamy again.)

ENJOY!!!

P.S  Did I tell you how I acquired this ice cream maker?  Flea market, a husband whose wife had an affair on their honeymoon, so he took all of their wedding gifts to the flea market, I got this baby for 5.00! 

Your "I scream you scream we all scream for HOMEMADE ice cream" Chefwannabe

Friday, July 5, 2013

Strawberry Rhubarb Muffins

Rhubarb, it is such a scary word isn't it?  When I was growing up we had a patch of rhubarb that seemed endless.  The huge leaves we were warned to NEVER eat.  We would pick it out and just eat it plain.  I can't IMAGINE that now.  My mom froze it, made everything with it, and as it wasn't my favorite then, it still isn't.  I had one of my sisters who doesn't like rhubarb taste test these after my first batch.  I was concerned there wasn't enough rhubarb. HA.  She took the tiniest bite and then in the trash it went.  I asked, "WHAT IS WRONG" she said, "OMG THEY ARE RHUBARB".  So for your rhubarb lovers, I guarantee, you will love these. HAHA


These muffins are very easy.  I would suggest you use your food processor.  The strawberries need processed because they will serve as liquid in the recipe and the rhubarb serves as an addition so while I wouldn't puree it, I did pulse mine until it was in pieces about like NERDS candy.  The combination is tart and sweet, it is great, even though I don't groove so much on rhubarb I did enjoy one of these myself.  See, I AM a grown up..... sometimes. 

The key to these is not over mixing.  While I did not add brown sugar to the top, I think it would have been fabulous so I am writing it into the recipe.  (I added a sprinkle of plain granulated sugar). 

I have made a vow to always measure out my ingredients before cooking or baking.  This was my first day of my personal vow.  SO much easier, I am never looking back!  I mean I do it sometimes, but not always, but not anymore! 

You will need:
(makes 18 muffins)

1/2 cup granulated sugar
1 1/2 tsp baking powder
1/2 tsp baking soda
1/4 tsp salt
2 eggs that you have lightly beaten
3/4 cup pureed strawberries
3/4 cup milk
2 tbsp vegetable oil
1 cup FINELY mince or food processed rhubarb
2 cups all purpose flour
1/2 cup brown sugar (for topping)

Preheat your oven to 400 degrees F.  Line your muffin pans with liners or grease them liberally if not using liners.  In a large bowl add all ingredients EXCEPT flour.  Mix until completely combined.  Add in flour and mix ONLY UNTIL COMBINED.  DO NOT OVER MIX!  Scoop into your muffin cups and then sprinkle the top with brown sugar.

Bake 17-20 minutes.  Let cool and dig in!

Your "always retrying things I hated" Chefwannabe
 

Wednesday, July 3, 2013

Orange Sparkle

Can someone please tell me where the switch is for turning off the humidity?  I mean seriously, this is NOT funny anymore, sweating profusely within 30 seconds of stepping outside is not fun, it is not cool and it is DEFINITELY not pretty.  I mean, let me keep it real here, I am not much of an "outdoor" girl anyway.  Give me the beach, give me a beautiful yard and lots of flowers, but don't expect me to get dirt under my fingernails, or get to messy.  Know what I mean?  That makes me sound like quite the princess diva, which I'm not, and I do enjoy outside things as long as they are leisurely and don't involve or POSSIBLY involve, bugs, snakes, frogs, bugs, or snakes.  Clear?


Anyway nothing says "summer meals" like nice cold salads and desserts.   My husband loves it and wanted to share it with you. 

I am not sure if you call this dessert, or eat it with your meal, you know that whole battle of the jello thing.  Do what you do.  This is so easy, and so delicious.  You can serve it out of one bowl or do as I did and divide it into 4 large servings.  You could easily get 6 individual servings. 

1 (3oz) pkg orange jello
1 cup boiling water
2 cups orange sherbet
1 (11oz) can of mandarin oranges
2 cups miniature marshmallows

In a bowl, stir together jello and boiling water until jello is dissolved.  Add in sherbet and stir or whisk until dissolved.  Chill this mixture until almost firm, and then fold in oranges and marshmallows.  You can fill up individual servings or place in a large casserole type dish.  Chill at LEAST 3 hours. 

This is light and delicious and sure to be enjoyed by all, no matter how you serve it!!

Your "loves all things that sparkle" Chefwannabe


Tuesday, July 2, 2013

Citrus Spritzer

I have to admit something. 

I recently visited my mom, who, though she completely is lost by this "blogging" thing, is very supportive of it.  She has been "going through" everything in her house, because she knows I love all kinds of dishes to photograph on and just for general use. 


Well, I knew I wanted to make a citrus drink but I also wanted a clear pitcher.  For some reason, I do not own a clear glass pitcher.  So while doing dishes, I spot one in her cupboard.  Now, she has shrunk to about 3'7 and I know she doesn't even remember it is in the TOP of the cupboard let alone use it.  So I finish the dishes, put on my best "perfect 10" face and into the living room I go.  It went something like this:

Me: Hey Mom, you don't happen to have a clear glass pitcher you want to get rid of do you?
Mom: I don't think so, let me think.
Me: (waits patiently, baring my pearly whites)
Mom: If I do ,it would be in the corner cupboard on the top shelf of the lazy susan. (where they have been for at least 150 years)
Me: Ok, I am going to look.  What if I find one?
Mom: Well, bring it here if you do.
Me: (goes into kitchen pretends to bang things around).  I FOUND ONE!!
Mom: Let me see it!
Me: OMG it is perfect for what I need.  Do you USE it?
Mom: No but it belonged to Marie.
Me: And?
Mom: Well, I don't really want to get rid of it.
Me: Mom, be real here, when is the last time you used it.
Mom: Well probably never but that is beside the point.
Me: You said you are cleaning things out, just think of what a good home this will have.
Mom:  Let me think about it. 
Me: Ok well do you want me to put it back in the cupboard or put it in this box of stuff you found for me.
Mom: Chris, you aren't going to trick me into giving it to you.
Me: Mom, there is no statute of limitations on child abuse and you spanked me with a wooden spoon, at LEAST 5,000 times as a child. 
Mom: If you don't put that pitcher back in the cupboard you are going to see me turn this walker into a deadly weapon.
Me: Mom, you seem angry, are you ok?  Is this part of dementia that is likely setting in?
Mom: The only demented thing about ME is giving birth to YOU. 
Me: Give me the pitcher mom, just do it.
Mom: FINE.  Take the pitcher but if I want it back you better give it back.
Me: You won't, but ok.

See it is all about wearing them down kids!  Even at 39, I can wear her down.  Really we were laughing so hard during this conversation it was pretty hilarious, perhaps you had to be there. 

Anyway, to the point at hand.  What is better on a hot summer day than a refreshing, cold beverage?  Water is almost always my first choice, but this citrus drink, is SO refreshing, you won't want to be without it!

I think this would be great served for a party, a meal, or just an afternoon by the pool, in the backyard, anywhere! 

1 12oz container of frozen limeade concentrate
2 oranges (1 sliced)
2 limes-sliced
1 lemon-sliced
1 liter Sprite/7 up/Sierra Mist OR Prosecco
1/4 cup sugar (optional, use it if you think it needs it)

Mix limeade according to package directions in a large pitcher.  Cut one orange in half and squeeze into limeade, discard when you have squeezed all the juice from them.  Stir.  Add in citrus 20 minutes before serving.  If you add it before that, the peel will bitter your beverage.  Pour a glass 1/2-3/4 full of limeade and then spritz it with your carbonated beverage of choice.  Make it alcoholic or don't, the choice is yours!

NOTE! Make sure to get extra fruit to garnish glasses or to add a slice into each glass when serving!

I hope you try this and I hope you love it so much, you have to keep making it!  It is the perfect summer refresher, that can be made in one pitcher, and spritzed for either a drinker or a non drinker!

Your "aaahhhhhhh this is perfect" Chefwannabe


Monday, July 1, 2013

Chocolate Crunch Brownies

I sat down to write this out for you, but I am eating one as I type and right now, IT wins.  Brb.....

10 minutes has passed. 


I am sitting here visiting with two of my sisters, numbers 1 and 5.  My siblings are all going to be known by their birth order number now I guess.  Number 5 is sitting here commenting how she is the "poor middle child", never got any attention.  Can you feel my sympathy?  Number 1 just threw in the "we are trying to find some compassion poor middle child" comment.  HA.  See, I come from a long line of snot nose brats.  At least I come by it honestly.  Right?  RIGHT?

I told these broads I had work to do so if I write something that makes no sense at all, blame them.

I was thinking I hadn't made many bar type desserts and quite frankly I like bars.  I am on a cupboard use up!  This was born out of that.  I had random things needing used and it turned out simply delectable!  A nice crunchy top, a gooey marshmallow middle and a chewy brownie bottom.  I love all of the texture going on in these, it is a party in your mouth!

These freeze quite nicely and really stand up to hot weather well, so great for outdoor parties!

You will need:

1 box brownie mix  (one you can make in a 7x11 or 9x9 or 8x8 baking dish)
1 10oz bag of mini marshmallows
1/2 stick of butter
1/2 cup nutella
3 cups rice crispies

Prepare brownies per the package directions.  Use one of the sizes mentioned above or something very close.  You won't have enough rice crispy mix for a 9x13.  IF you choose that size, or it is all you have, you will need to double the ingredients in red. 

Remove from oven and pour over 1/2 of your bag of marshmallows.  *you will need the rest for the topping*.  Turn the oven off and put the brownies back in for 5 minutes.  The marshmallows will melt and puff up.  Remove and let cool, the marshmallows will deflate a bit. 

In a medium saucepan melt butter, add in marshmallows and nutella.  Stir constantly until all ingredients are melted, and smooth.  Add in rice crispies.  Stir until all ingredients are combined and spoon small blobs over the marshmallow topped brownies.  Then you can use your fingers sprayed with nonstick spray or a spatula to connect them, thus, covering the entire top of the brownies. 

Refrigerate for 20-30 minutes. 

NOTE: I also lined my pan with parchment going on direction.  Leave it longer than you need so you can "lift" the brownies out of the pan to cut them easier. 

Enjoy these yummy chocolate treats!

Your "crispy, gooey and chewy" Chefwannabe